Title: Mortal Kombat 4
    Developer: Midway Games Inc., converted by Eurocom Developments Ltd.
    Publisher: Midway Games Inc.
    Genre: Fighting

I can hear the groaning now: "Oh, great, another Mortal Kombat game. Whoopee." Well, I was actually thinking the same thing, prior to playing the game. The original Mortal Kombat debuted in arcades across the country in 1992. It was an immediate smash hit because of the unique characters, which were digitally rendered, and the sheer amount of blood and gore present in the game. Before Mortal Kombat hit the scene, the Street Fighter franchise was king of the arcade fighting game block. Based upon the resounding success of Mortal Kombat 1, Mortal Kombat 2 arrived, followed by Mortal Kombat 3, Ultimate Mortal Kombat 3, Mortal Kombat Trilogy, which was exclusively released for the N64 and Playstation, Mortal Kombat* Mythologies, also exclusively for the N64 and Playstation, and finally, Mortal Kombat 4. There have also been two full-length Mortal Kombat motion pictures. The Mortal Kombat franchise is alive and well and it looks like it's going to stay that way. I, for one, used to be a Mortal Kombat fan, but excessive play and other games ensured a long Mortal Kombat hiatus for this reviewer. Read on and find out if my interest had been renewed.

From the moment I hit the power button on my Playstation, I could tell several changes had been made to the Mortal Kombat formula. Instantly noticeable was the full-length CG intro, made popular by the Tekken series. This intro was quite a sight to behold and lasted for a good few minutes. Once I had finished viewing the intro, I came to the main title screen. Again, I could see that things were already quite different. More thoughts of Tekken popped into my head as I noticed not only the staple Arcade and Options modes, but the Team, Endurance, Tournament, and Practice modes. I won't bore you all with explanations of the various modes because I've already explained them in previous reviews. If you haven't read my previous reviews, or would like a description of the various modes I just named, please refer to my Dead or Alive review in the archives section of Collector Times Online. The only mode I am going to delve into is the Endurance mode, which isn't quite the same as the Endurance modes on some other fighting games.

In MK4, the Endurance mode is not really one mode, but three. You've got Endurance, Vs. Endurance, and Ultimate Endurance. In the regular Endurance mode you select one character and then pick your difficulty from the Destiny screen. The Destiny screen is unique to Mortal Kombat and is essentially a second difficulty setting. You can, of course, select your difficulty in the main Options menu, but once you've done that, you have to choose your destiny at the Destiny screen. At that screen you'll see five columns, with each level of each column depicting the bust of one of the MK4 characters, each of which is an opponent. Novice, Beginner, Warrior, Master, and Master 2 are each of the subsequent difficulty levels, and as you might've guessed, Novice is the shortest column and Master 2 is the tallest. Now, back to my explanation of regular Endurance mode. After picking your destiny at the Destiny screen, your game will start. Your health in this mode won't regenerate, as is the case in the other two Endurance modes, Vs. and Ultimate Endurance. You have to win every match to win, and once you've lost once, the game ends. In Vs. Endurance the CPU chooses a character for both you and a friend in a predetermined order. Also, in Vs. Endurance, you don't fight any CPU opponents. It's just you and a friend. When one player uses all of the standard characters, the match concludes. The player who has the most wins at the conclusion is the winner. Finally, in Ultimate Endurance, you'll fight one round at a time against each character in the game until you lose. The game is then over. When the game is finished, whether you lost or won, you will get an Ultimate Kombat Rating which displays various statistics and a Kombat Rating. It's a bit of a silly and frivolous addition in my opinion, but it doesn't do any harm.

As for game play and music, both are different, yet very similar to previous Mortal Kombat games. In previous installments of Mortal Kombat, you could rack up combo's that would drain upwards of 80% of your opponent's life bar. This has been rectified in MK4. This time around, there's a feature called Maximum Damage. You can do a big 10, 12, or 15 hit combo in MK4, but your percentage of damage can't exceed a certain amount. The amount varies, depending on the character you're using and playing against, but it's somewhere in the vicinity of 45%. This is a fantastic addition, in my view, as it prevents cheap, piddly tactics. It keeps things honest, in other words. Another new feature in MK4 are weapons that can be drawn and used in battle. Each character has a weapon unique to them, and can throw their weapon, whether the weapon is in their hands, or on the ground from a previous throwing.

Graphically, MK4 has gravitated away from the digital 2D look, and has instead adopted a more 3D Tekken-esque look, complete with multiple plains of play and a sidestepping feature. As you might have expected, the blood and gore in MK4 is very excessive. It's even a bit ridiculous. For example, when Johnny Cage, one of the characters, performs his decapitation fatality, in which he uppercuts his opponents head off, a virtual ocean of red gushes forth. The amount of blood coming from the victim would far exceed the amount of total blood in a large African elephant. It's needless, but it's a Mortal Kombat staple, so I knew before I even got the game that it would be there. For those of you unfamiliar with Mortal Kombat, a fatality is a move that each character can perform at the conclusion of a match that finishes off their opponents in a most brutal fashion. There's appendage removal, impaling, and other sordid and twisted things. By the same token, the Babality and Animality finishing moves that were present in MK2 and MK3 are now gone. Babality's were finishing moves that turned your opponent into a little, diaper wearing baby, and Animality's were finishing moves that turned your character into an animal, and then had your character perform some death inducing move. The exclusion of these moves was a good move, as far as I'm concerned.

There are some other things I won't bother going over like the Kombat Kodes, the various new and returning characters, and the many stages, but you can see those things for yourself, should you choose to try MK4. If you happen to like fighting games in general, MK in particular, or lots of blood and gore, MK4 is for you. If you're not really a fighting game fan, this game wouldn't do much for you. All in all, MK4 is nothing truly revolutionary, but it's a solid fighting game nonetheless, and one that, at least, merits a try amongst fighting game fans.

    Developer: Naki
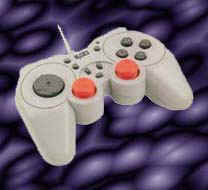
    Genre: Peripheral
    Title: Analog Rocker Pad

Not to be outdone by Sony or InterAct, Naki has entered the soon to be crowded Dual Analog Shock pad market. Dual Analog Shock pads are now all the rage for the Playstation, and with good reason. They allow for better control, and the force feedback option really gives you more of a feeling of being in the game.

Once I took the Analog Rocker Pad out of the box and held it in my hands, I could immediately tell that it was solidly constructed. It's the perfect size and fits great in my hands. I also notice the nice options that are built into the Analog Rocker. It has Turbo Fire and Slow Motion, as well as a raised directional pad and an eight-foot cord. Unlike the Sony and InterAct pads though, the two analog sticks on the Analog Rocker are not rubber coated, but rather plastic coated. This means that after extended play your thumbs are going to take a bit more of a beating than they would if you were using the Sony or InterAct brand Dual Shock pads, but you'd definitely have to play for hours and hours for it to make a difference. I also like the fact that the Analog Rockers' analog sticks have recessed faces. Because of this, your thumb, or thumbs, fit nicely on the analog sticks, while also having less chance of slipping. After checking out the pad, I decided I'd test it out, so I popped Mortal Kombat 4 into my Playstation and started playing. Soon after I started, I noticed some problems with the pad that I hadn't really taken into consideration upon my initial inspection. The first problem was the directional pad. The directional pad on the Analog Rocker is one whole piece of plastic, instead of four separate and individual pieces, as is the case on the majority of Playstation controllers. I found this to be a problem because the directional pad just didn't respond as well as the pads I've used that have four separate pieces for the directional pad. Also, the directional pad on the Analog Rocker was too small for me, and that became a bit of a nuisance as well. The other thing I found annoying was the spacing of the select, start, and analog toggle buttons that are in between the two analog sticks. They're simply jammed too close together. Again, this was more of a nuisance than a big problem, but nevertheless, it was a factor.

Aside from the minor problems I mentioned, the Analog Rocker really shines. If not for what I see as minor design flaws, I'd say the Naki Analog Rocker pad is the best Dual Shock Analog pad available. However, the flaws are there, and as a result, the Analog Rocker comes up a bit short. If Naki corrects these problems, which shouldn't be too difficult, they'd have a pad that would be very hard to beat. Still, this is a pad that I'd recommend to everyone to check out, as you may find that the directional pad and button spacing suit you fine.

    Developer: Naki
    Title: Six Mega Byte Memory Card
    Genre: Peripheral

Memory cards: there are a countless number of them available today. There are many brands, colors, styles, sizes, storage capacities, and prices among the numerous varieties of memory cards. The standard memory card comes with one megabyte of memory and fifteen save game slots. More recently though, a number of companies have released cards that have capacities many times that of a regular memory card. Naki, being one of the leading peripheral manufacturers, is no exception. They've got a ninety-slot memory card, and it comes with some nice features.

The first thing you notice about this memory card is the digital LED screen that's built into it, as well as the sleek design. When the card is in use, the screen lights up, and the display is quite bright and can be easily read. Also, as opposed to some cards, this card fits snugly into the Playstation, so there's no concern about the card slipping out at any time. Each page of the memory card holds fifteen blocks of data, and you can toggle between the six pages on the card by holding down select and pressing one of the L or R buttons. When you do, the page number you're on and switching to will be displayed on the LED screen. The one thing, more than any other, that I really like about this card is that it has an actual six megabytes of memory. Why is it a big deal for the card to actually have six megabytes of memory? Well, there's a big controversy right now over extra capacity memory cards. What's been happening, is that many memory card manufacturers have been utilizing compressed memory technology on their cards, and that has caused many, many problems. Scores and scores of people have experienced inexplicable data loss while using these cards, and this has caused and fueled the controversy. In any case, that's the backstory on extra capacity memory cards, and why having the actual amount of memory stated on the box is important.

The Naki Six Mega Byte Memory Card is well built, fits nicely into the memory card slot of the Playstation, has a bright and easy to read LED display, and has an actual six megabytes of memory. If you're going to plunk down the cash for an extra capacity memory card, I'd definitely recommend this card as one you should seriously consider.

    Developer: InterAct
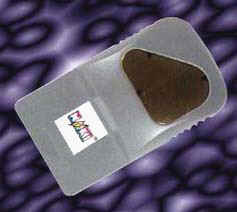
    Genre: Peripheral
    Title: GameShark

Some of you may remember a peripheral for the NES, Super NES, Genesis, Game Gear, and Game Boy systems called the Game Genie. The Game Genie plugged into the cartridge slot of the aforementioned systems and allowed you to then plug a game into it and make codes for that game. You could become invincible, have infinite lives, etc. Well, the GameShark is essentially the same as the Game Genie, and I do mean essentially. About the only similarity between the two is that they both allowed the user to make codes which do various things. The GameShark is loaded with options and features, so let me get right to them.

The first thing you'll notice about the GameShark is that It's fairly small; about the size of a Post-It Notes pad. It has a port on the front and on the back. The GameShark interfaces with the Playstation via the I/O port, located on the back of the Playstation on the right-hand side. You have to pry off the I/O port cover, which is a real pain, but once you do, the GameShark simply plugs right in and is ready to go. Also, there's a switch located on the right side of the GameShark. This switch must be in the up position in order for the GameShark to work.

Once you've done all that, you're ready to go. The first thing you'll notice upon powering up, is the GameShark logo screen which is then quickly followed by the main screen. The menu on the main screen is clear and easy to understand. At the top of the screen, it'll say what version your GameShark is, and then you'll see a bar labeling the screen as the main menu. Below that are five options that lead you into other functions of the GameShark, and below that you'll see a number telling you how many games are currently supported by the GameShark, as well as the total number of cheats available. You also see whether or not a game is currently selected and whether or not there are any cheat codes on. Now, on to the five main menu options.

The five Main Menu options are Start Game, Select Cheat Codes, Memory Card Manager, Explorer, and Re-Read CD. Start Game simply lets you start whatever game you have in the Playstation utilizing cheats or no cheats. Select Cheat Codes, as you all might've guessed, allows you to select a game from the list of currently supported games on the GameShark, and then a code that's already on the GameShark for that game. If the GameShark doesn't have a listing for a game you want to use it with, then you have the option of selecting New Game from the top of the games list. This allows you to input the name of the game you have and any cheat codes you might happen to know. There are many sites on the Internet that have GameShark codes, and new codes pop up daily. The Memory Card Manager option is basically identical the to Memory Card Manager option that's built into the Playstation. You can copy, edit, and delete saved game files from any memory cards you happen to have. There's also an option which allows you to change the icon that's associated with a particular saved game on your memory card, which I think is kind of neat. Finally, you have the Explorer option. This option allows you to do quite a number of things. Once you select the Explorer option on the main menu, you're taken to a screen with four other options. These are View Video Image, View CD Image, Play Music CD, and Use Enhancement CD. The View Video Image allows you to view the image that was last in the Playstations' video RAM the last time the reset button was pressed. While viewing whatever image it happens to be, you can manipulate it in a number of ways. You can change between a 24 and 16-bit viewing mode by pressing the triangle button and you can use the L1 and R1 buttons to change the screen resolution. View CD Image allows you to view images that are stored on whatever CD you have in the Playstation. When you select this option, the GameShark searches for all viewable files and then lists all the filenames of the ones it found. While viewing whatever image you select, you can manipulate the same things using the same controls as in the View Video Image mode with one addition, that being that you can use the directional pad to move the image around the screen. The Play CD Music option allows you to play music from a game CD or from a normal audio CD. The Use Enhancement CD option is an option which allows you to use special CD's released for use with the GameShark to upgrade it. Finally, the Re-Read CD simply re-reads whatever CD you have inserted in the Playstation, in case you think the GameShark misread the CD.

All in all, I think the GameShark is a nice item to have, especially for those games which are impossibly hard or have gotten old and boring. If you're into codes, or you simply like being able to tinker with your games in various manners, the GameShark is definitely for you.

    Developer: InterAct
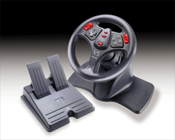
    Title: V3 Racing Wheel
    Genre: Peripheral

For those of you who want a real driving experience when playing a racing game, InterAct has developed the V3 Racing Wheel. The V3 comes complete with a full size steering wheel as well as gas and brake foot pedals. It also has plenty of little extras that make it a really great product, so let me get to all those extras and features.

Upon taking the V3 out of its box, I could tell it was well built. It also has a sleek design, and the button layout on the wheel is very nicely done. The V3’s wheel is ten inches in diameter, and it’s also auto centering. It has a three-hundred degree radius of rotation, and there are a total of eleven buttons on the face of the wheel. You also have the option of placing four suction cups on the base of the V3’s wheel unit, but I found that even after I snapped the suction cups in place, they didn’t stay on very well. However, the best thing about the V3’s wheel unit is definitely the adjustable wheel trunk. You can adjust the tilt of the wheel and the height of the wheel, which I think is very, very cool. It really makes the V3 a wheel that conforms to the user, instead of the other way around. The gas and brake foot pedal unit is also solidly constructed, and both pedals are spring-loaded, which further ads to the authenticity of the V3 Racing Wheel unit.

As for the buttons that are on the face of the V3, there are a grand total of twelve. There’s the directional pad, the start button, the select button, the set button, the four main action buttons, and the L and R buttons. The only button that merits a bit of explanation is the set button, and it simply switches between digital and analog mode. In digital mode, you use the directional pad for steering and the action buttons for acceleration and braking, whereas in the analog mode you use the wheel itself and the gas and brake foot pedals. If you are in digital mode, and you move the wheel itself beyond a thirty-degree rotation, the unit will switch itself into analog mode. The foot pedal unit will also become active when in digital mode if you press them down beyond ten degrees.

I’ve used other steering wheel units, and I can definitely say that the V3 Racing Wheel is the best one I’ve used. The only I would’ve liked to have had was a stickshift, but the lack of a stickshift didn’t make that much difference in the overall quality of the wheel. If you want an authentic driving experience when playing a racing game, and you’re in the market for a steering wheel unit, forget the competition and buy the V3 Racing Wheel from InterAct.

Page 2


[More Console-tations] [Back to Collector Times]
[Prev.] [Return to Reviews] [Return to Gaming] [Disclaimer] [Next]


Copyright © 1998 Ian Johnston

About the Author